
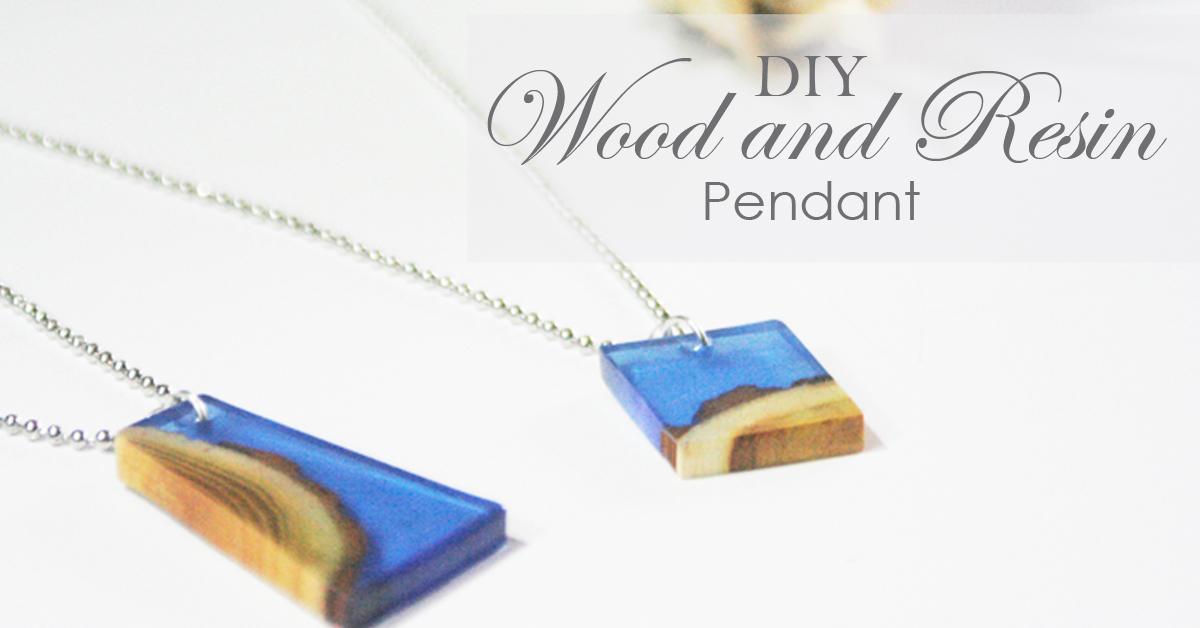
WOOD AND RESIN PENDANT WITH EASYCAST
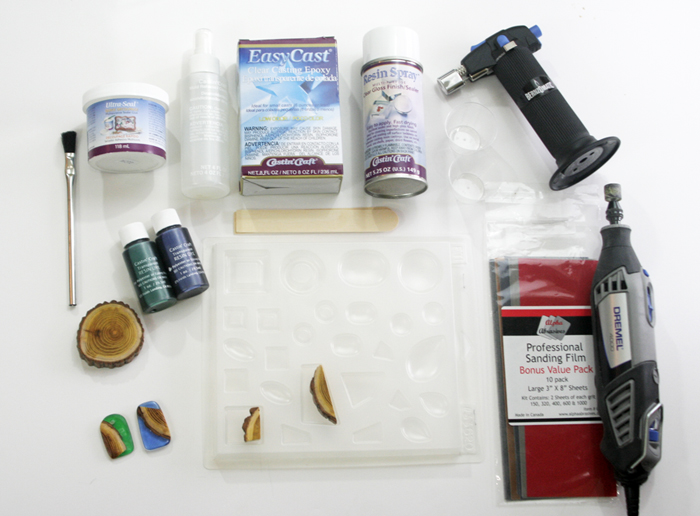
SUPPLY LIST:
- Wood chip pieces
- Ultra Seal
- Brush
- Mold Release Conditioner Spray
- EasyCast Clear Casting Epoxy
- 2 Wooden stir sticks with flat edge
- Two small mixing cups
- EasyCast Resin Jewelry Molds
- Transparent Dyes
- Micro Butane Torch
- Sanding tool – Dremel or alike
- Sanding film
- Castin’ Craft Resin Spray
PREP:
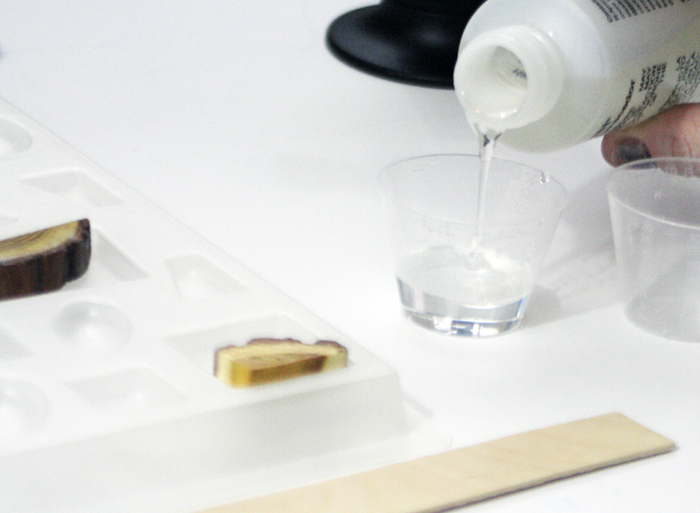
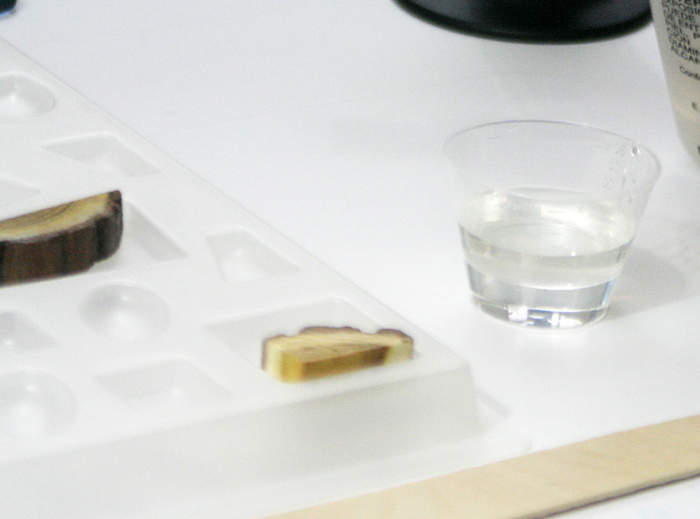
The first thing you want to do is fit your wood pieces into molds that you want to use, and spray those sections of your jewelry mold with the Mold Release Conditioner Spray. Let Dry.
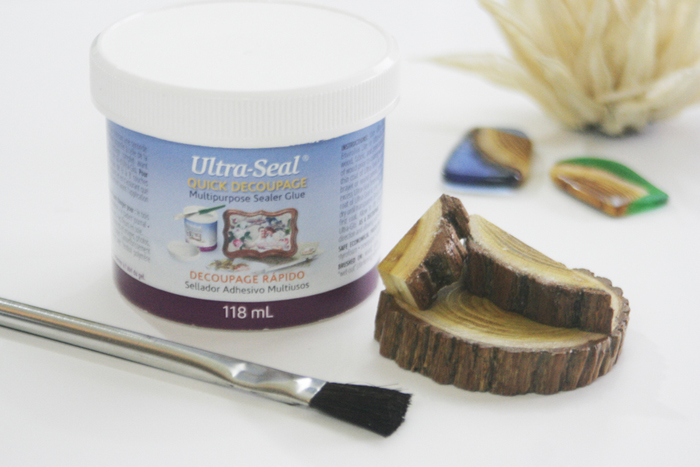
You also need to seal the wood pieces by coating them entirely in Ultra Seal and letting them dry. The Ultra Seal glue goes on white, but dries clear.
Next, prepare a work surface that won’t get ruined should something spill.
RESIN:
The EasyCast Clear Cast Epoxy comes in two parts. EasyCast performs best at at least 75° F . The bottles should feel slightly warm to the touch, if they feel cool, they must be warmed by placing them in warm tap water (not hot) for 5 to 10 minutes prior to using. If bottles become overheated, allow them to cool before using.
First, measure a small amount of the part A resin into a straight sided, flat bottom, wax free measuring container. My small cups had markings for measurements, and as the pendants are small, I did not need a lot of resin. If you need more, you’d want to use a larger mixing container.
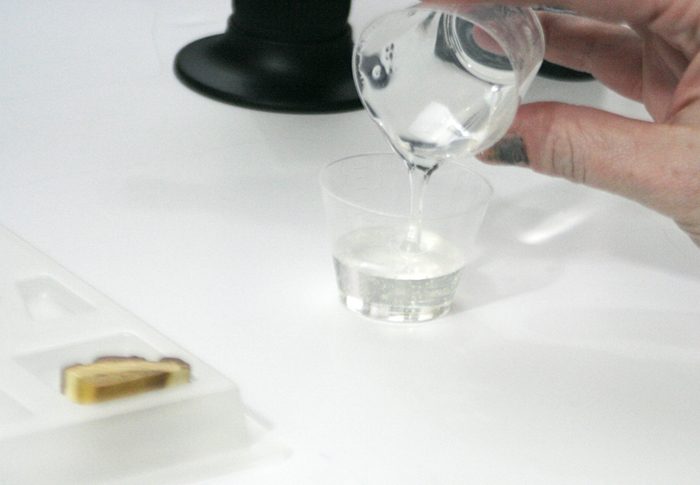
Next, measure the exact same amount of the part B hardener. Be as accurate as possible, as too much or too little will result in soft or sticky castings.
Use your wooden stir stick to mix the two parts thoroughly. Be sure to scrape the sides and get all of it mixed as much as possible. Stir together for about two minutes.
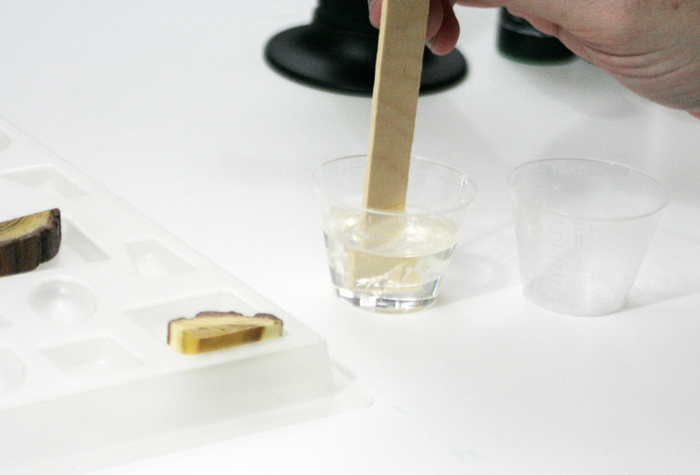
Pour the mixture into the second cup and continue stirring with a new, clean stir stick. This is called the double-mixing method and is necessary to ensure your two parts are completely mixed.
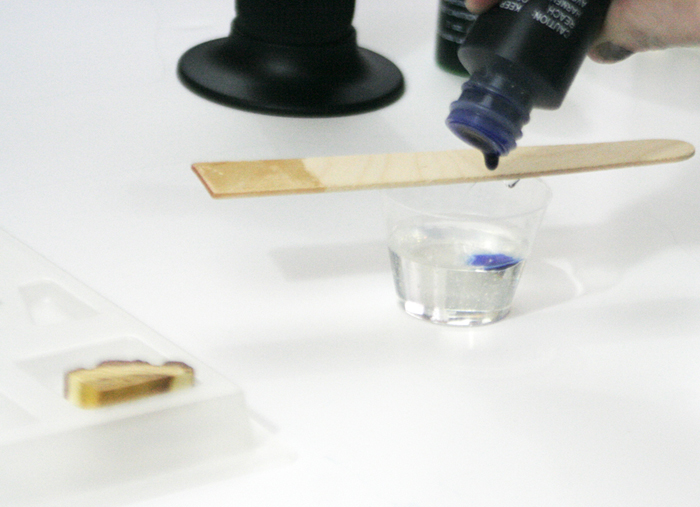
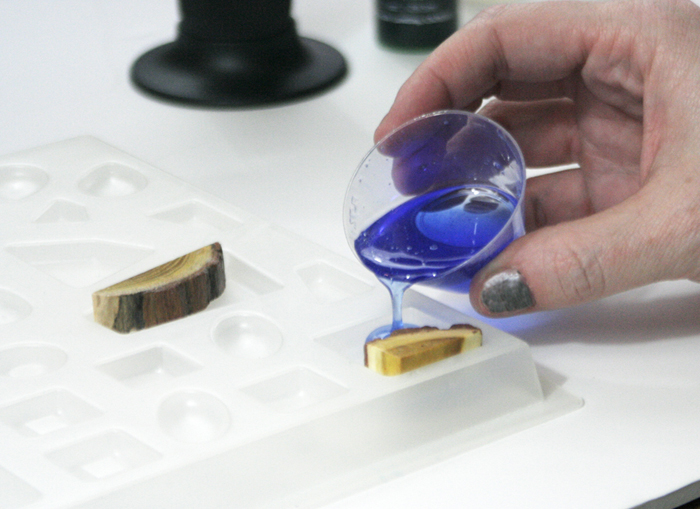
Now add your transparent dye, or whatever color you are choosing for your project and stir in completely.
POUR RESIN:
Now grab your molds and your wood pieces and make sure the wood is in place inside the mold. Slowly pour the resin into the mold. I held the wood piece in place also, to be sure it didn’t move while the resin was settling. I opted to make two pendants this time, so here you can see me pouring both.
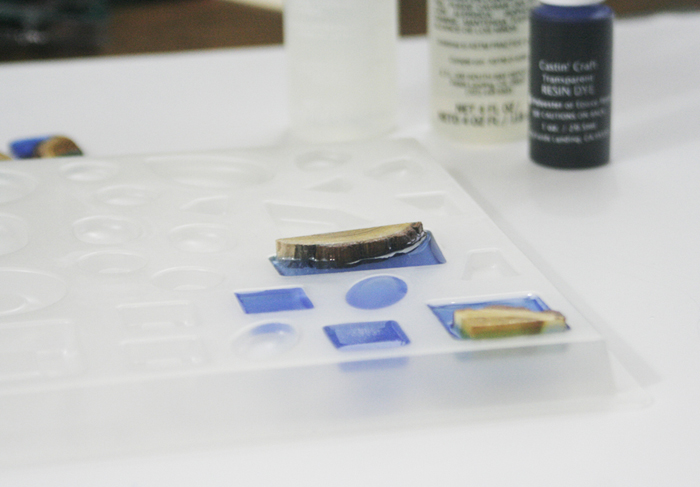
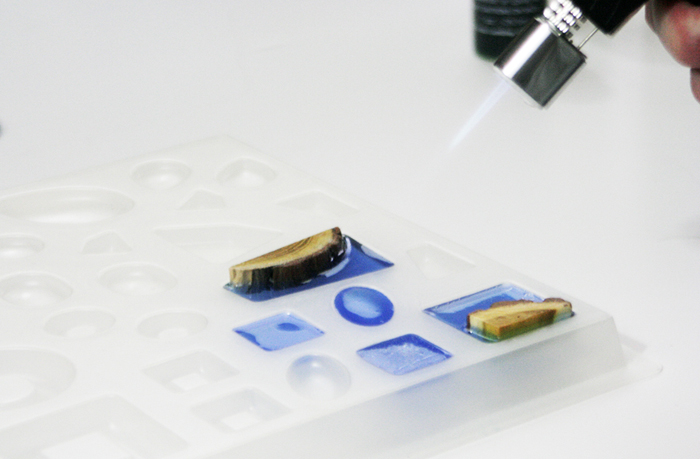
After the resin sits for a few minutes, small bubbles will appear at the surface. This is where I used my micro butane torch and quickly swiped it over the pendants. This does give off a lot of heat which will melt the plastic mold, so do this very quickly. As you can see in this photo, I had plenty of excess resin so I just put it into nearby molds and cast some random pieces so that it wouldn’t go to waste.
Let the resin cure for 48 -72 hours depending on the temperature of your room or thickness of the cast. I checked mine after 48 hours and it was cured hard.
SANDING PENDANT:
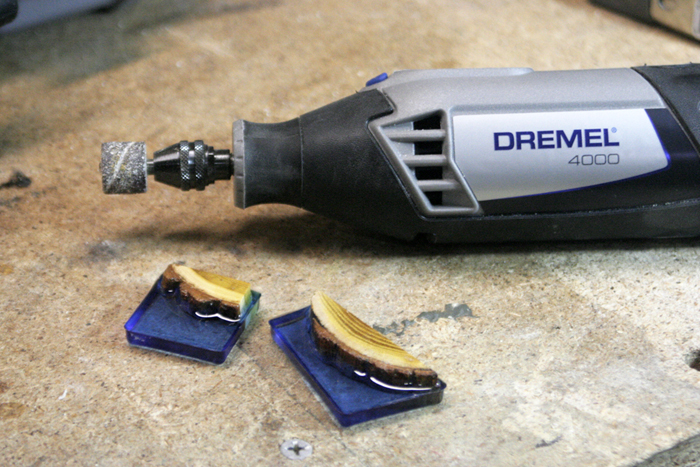
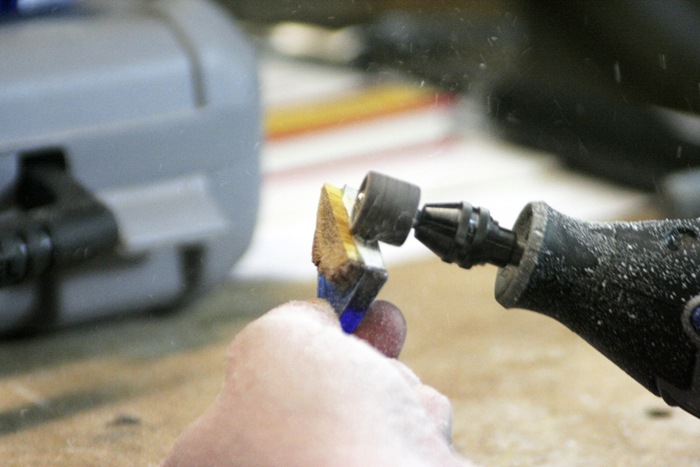
Alright, now that you have your pendants cast, pop them out of the molds and get your sanding tool ready. Always use eye protection and don’t forget your dust mask, you don’t want to inhale the particles. Safety first! As you can see here, I am using a fairly coarse sanding tool at first to sand down the wood pieces to be even with the resin. In hindsight, it would have been easier to use a thinner piece of wood, but this ended up working just fine, there was just a bit more sanding to do.
Here’s a sanding action shot.
Once your wood is sanded down, switch to a finer sandpaper and roughly shape the pendant.
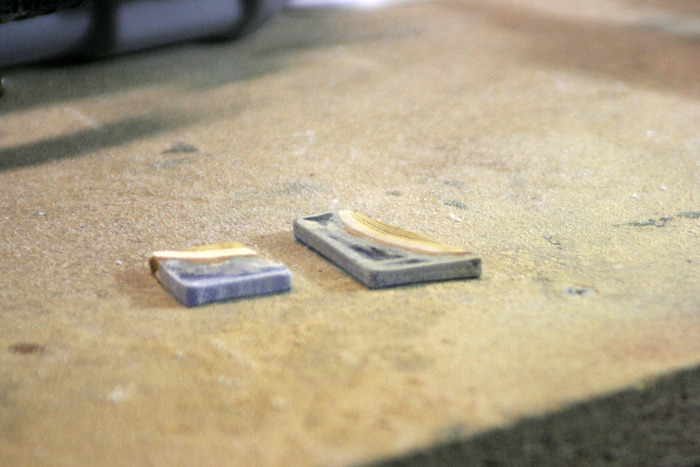
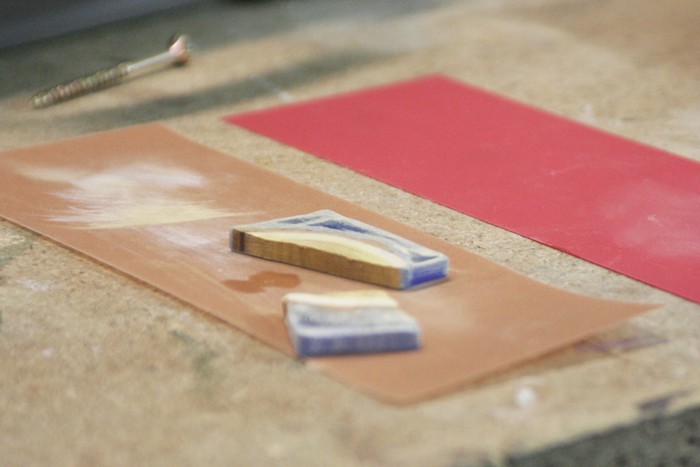
Next, I used some sanding film that I bought at the hobby store and sanded every side of the pendant with fine sandpaper (600 grit) and then very fine sandpaper. I believe this sandpaper went up to 1200 grit. You don’t want to cut this step short. This is important to reduce any scratches in the resin which would be left by coarser sandpaper. It takes awhile, but it is worth it to get a smooth finish.
At this point I used a small drill bit on my Dremel tool to drill a small hole in the pendants.
FINISHING:
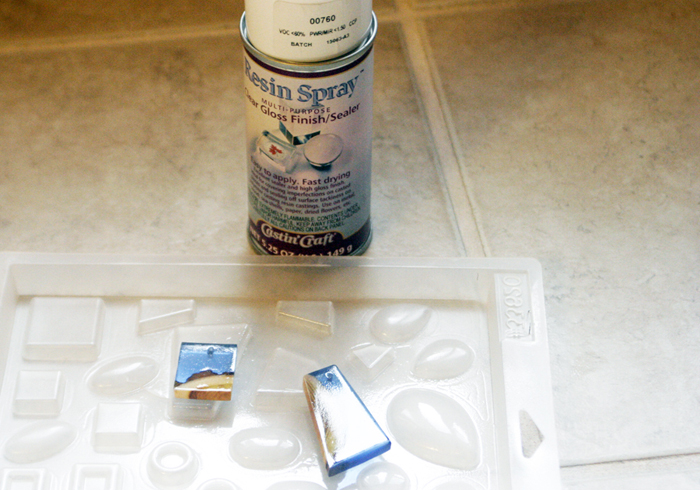
Finally, coat the pendants on each side with Resin Spray. This will give it a nice glossy, clear finish as you can see here. Be sure to coat each side completely, but don’t overdo it.
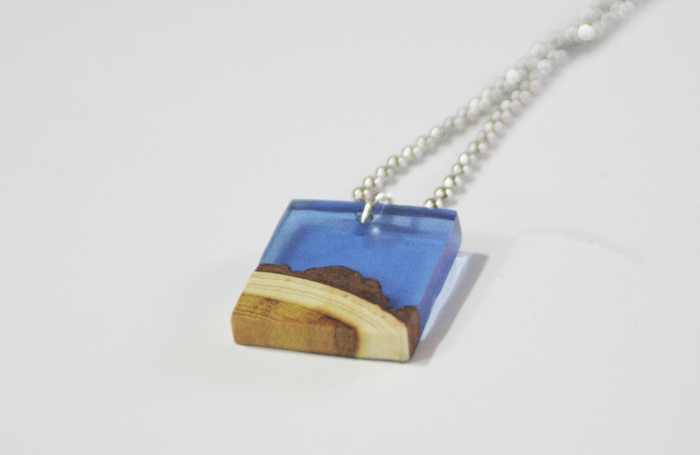
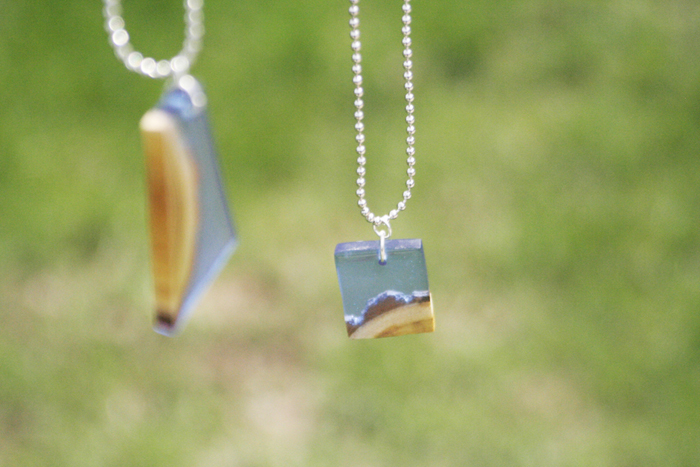
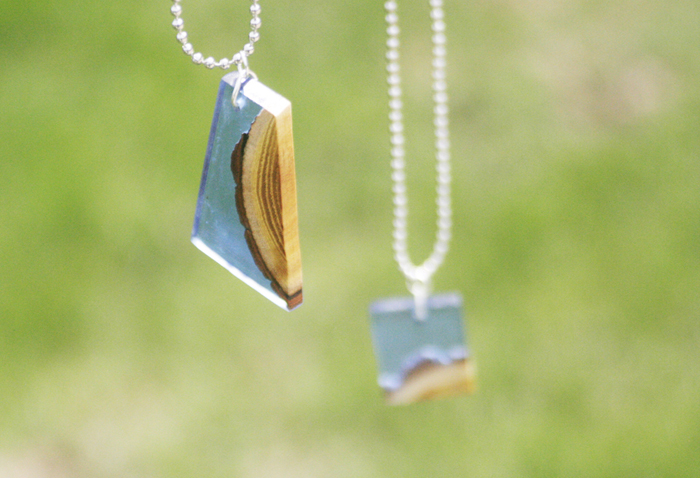
FINAL PHOTOS:
I added some jewelry jump rings and necklace chains. Now you have an amazing wood and resin pendant (or two)!

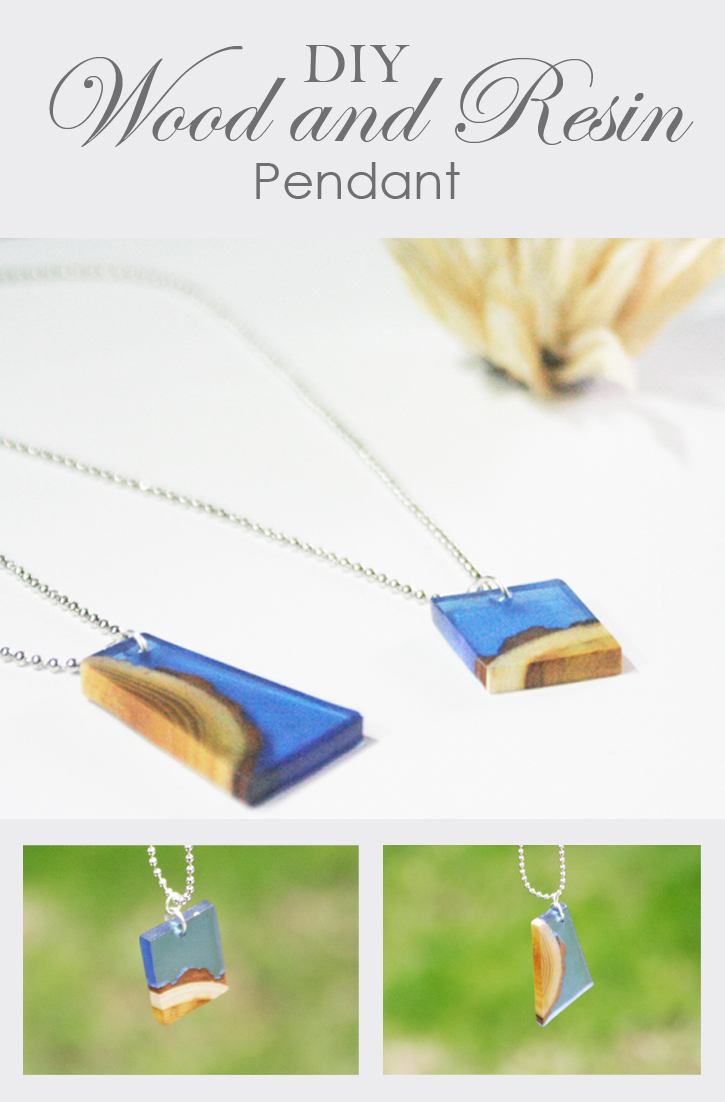
If you’re a fan of Pinterest, please share this great pinnable image!
I hope you enjoyed this tutorial! I am loving my new necklaces and hope this inspires you to try out some resin jewelry! Thanks so much for stopping by!
By Sheri
https://resincraftsblog.com/wood-and-resin-pendant-easycast/